Autonomous Code Lesson
Important
If there are merge conflicts in Choreo*.java, just discard changes and regenerate all paths in Choreo
What Is Autonomous Code?
In FRC, "autonomous" (or "auto") refers to the period at the start of a match when your robot must operate without driver input. The robot follows pre-programmed instructions to score points—like driving to a location, picking up a game piece, or balancing.
How Does Auto Code Work?
Auto code is a sequence of commands or actions that the robot executes automatically. These can be as simple as "drive forward for 2 seconds" or as complex as "follow a path, pick up a cube, and shoot it."
Step 1. Define Your Auto Goals
Decide what you want your robot to do during auto and where you want it to start.
Whiteboard them out!
Write these steps out in plain English first!
Examples:
- Drive off the starting line
- Score a game piece
- Balance on the charge station
- Run a multi-step sequence
Step 2. Break Down Actions Into Commands
Each action (drive, turn, shoot, etc.) should be a command/state or function in your codebase.
Example commands:
PrepShooting()Shooting()Intaking()
Step 3. Configure Autos in a Method
Update configAutonomous() method to build your auto routines and add them to the chooser. This keeps your constructor clean and matches the RobotContainer.java pattern.
public void configAutonomous() {
  Command nameOfAuto1 = Commands.sequence(
      new Command1(),
      new Command2()
  );

  Command nameOfAuto2 = Commands.sequence(
      new Command1(),
      runPath("auto2path1").asProxy(),  // Example of running a path
      new Command2()
  );

  Command nameOfAuto3 = Commands.sequence(
      new Command1(),
      runPath("auto3path1").asProxy(),  // Example of running a path
      new Command2(),
      runPath("auto3path2").asProxy()   // Example of running a path
  );

  autoChooser.setDefaultOption("Do Nothing", Commands.none()); // Always have a safe default
  autoChooser.addOption("Auto Routine 1", nameOfAuto1);
  autoChooser.addOption("Auto Routine 2", nameOfAuto2);
  autoChooser.addOption("Auto Routine 3", nameOfAuto3);
  SmartDashboard.putData("AutoChooser", autoChooser);

  Map<Command, String> autoStartingPoses = Map.ofEntries(
    // Always write the first path as the starting pose
    Map.entry(nameOfAuto2, "auto2path1"),  // Starting pose for auto 1
    Map.entry(nameOfAuto3, "auto3path1"),  // Starting pose for auto 2
  );

  // Listen for auto selection and reset odometry (this is in template already)
  autoChooser.onChange(selectedAuto -> {
    String startingPose = autoStartingPoses.get(selectedAuto);

    if (startingPose != null) {
      autoFactory.resetOdometry(startingPose)
          .ignoringDisable(true)  // Run even when disabled
          .schedule();
    }
  });
}
What are Paths?
Paths are pre-planned routes that your robot can follow during autonomous. Instead of manually coding every movement, you design a path visually using a tool like Choreo, and your robot executes it precisely.
Our template includes a runPath() helper method that makes it easy to run trajectories:
// Simple - just provide the trajectory name
Command myAuto = runPath("startPoseName_endPoseName");
What runPath() does:
- Loads the trajectory file by name (e.g.,
"startPoseName_endPoseName"loadsstartPoseName_endPoseName.traj) - Creates a command that follows it
- Uses
.asProxy()for proper command scheduling - Sets the driver state to CHOREO mode
That's it! The template handles all trajectory following internally. You just need to create paths and use runPath() to run them.
Note
Replace "startPoseName_endPoseName" with your actual trajectory names. e.g., "initTop_reefJI", "reefJI_CoralStation", etc.
Step 4. Deploy Trajectory Files
Choreo saves trajectories as .traj files and a project file as .chor. These must be deployed to your robot:
Step 1: Create the Choreo Folder
If it doesn't already exist, create the deploy directory for Choreo:
mkdir -p src/main/deploy/choreoStep 2: Understand the Directory Structure
Your deployment folder should look like this:
src/main/deploy/choreo/
  ├── all_paths.chor    # Project file (edit this in Choreo app)
  ├── top_ji.traj
  ├── ji_cs.traj
  ├── cs_ab.traj
  └── ...
Step 3: Add to Choreo Project Settings
In the Choreo desktop app:
- Go to File > Project Settings
- Set the Project Output Directory to your
src/main/deploy/choreo/folder - Save your project file (
.chor) to this location as well
Step 4: Generate and Deploy
When you generate trajectories in the Choreo desktop app, they automatically save to the folder you configured. When you deploy your robot code (via ./gradlew deploy), these files are copied to the RoboRIO.
Creating Paths in Choreo
Download and Launch Choreo
- Download from https://choreo.autos
- Install and launch the desktop application
- Create a new project or open your existing
.chorfile
Path Design Workflow
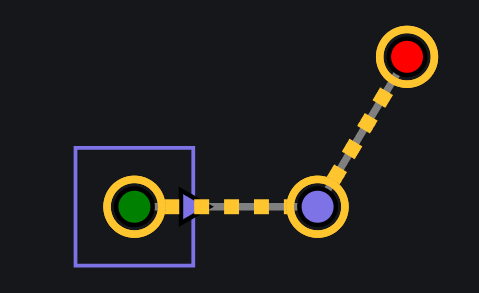
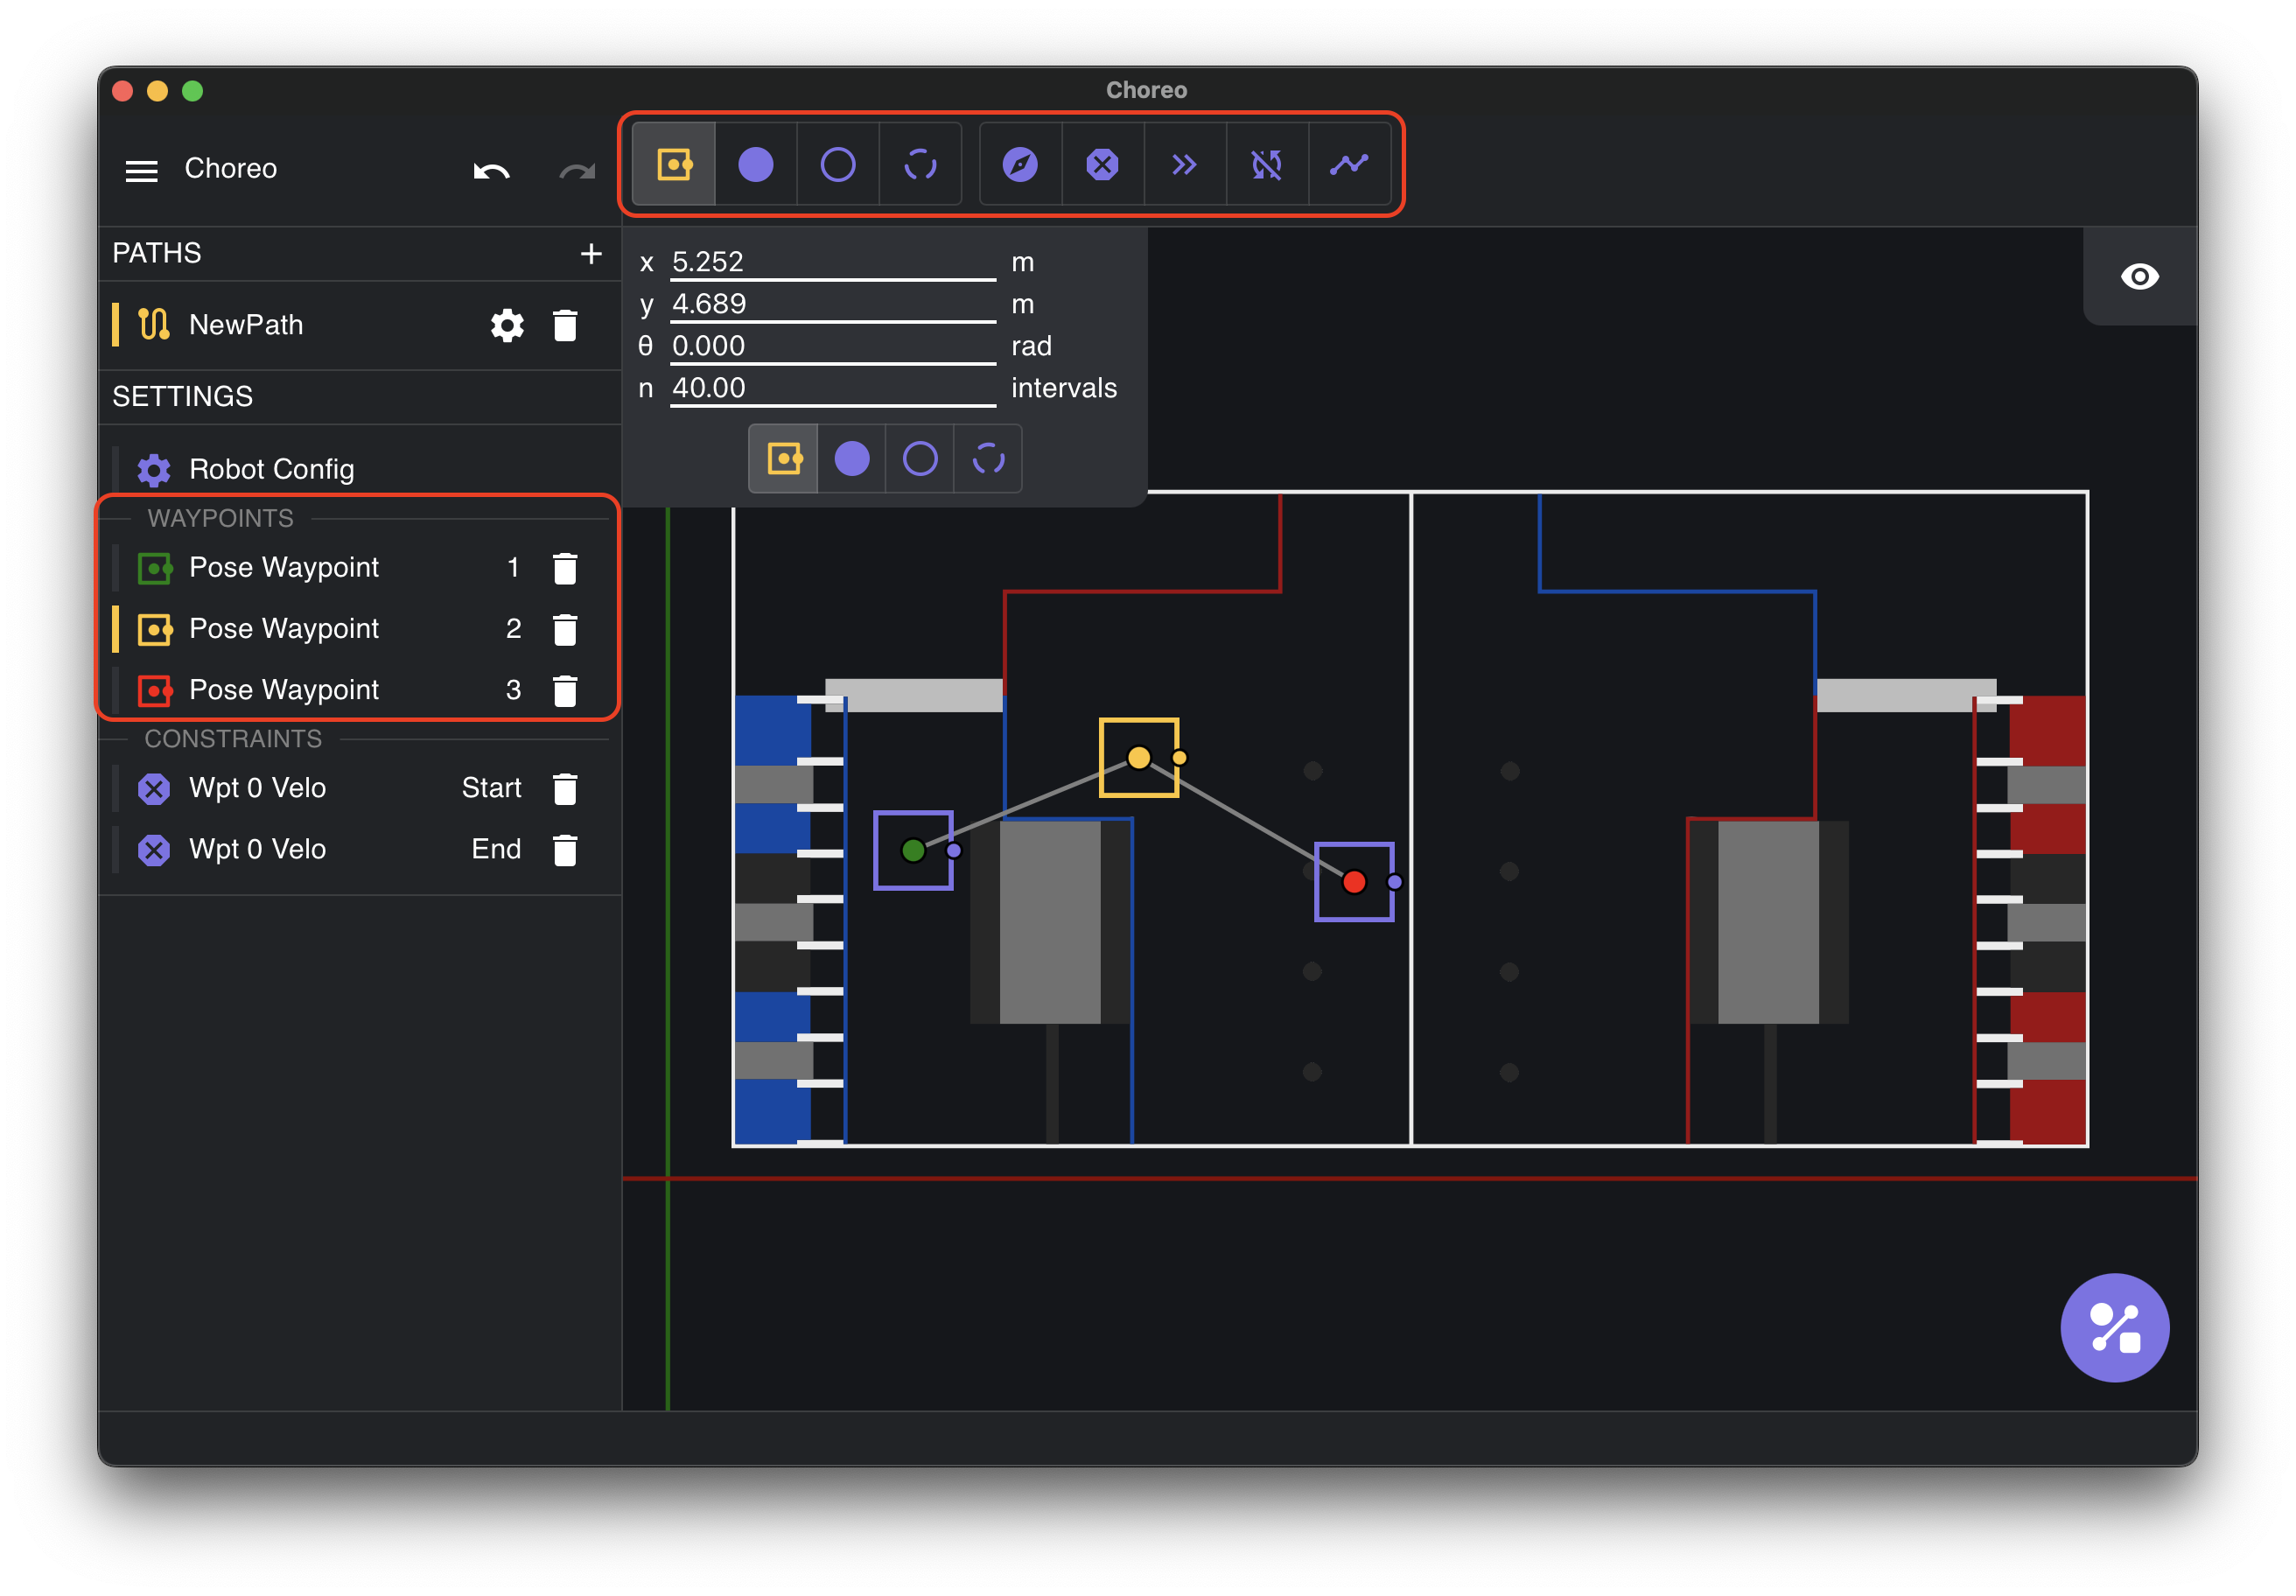
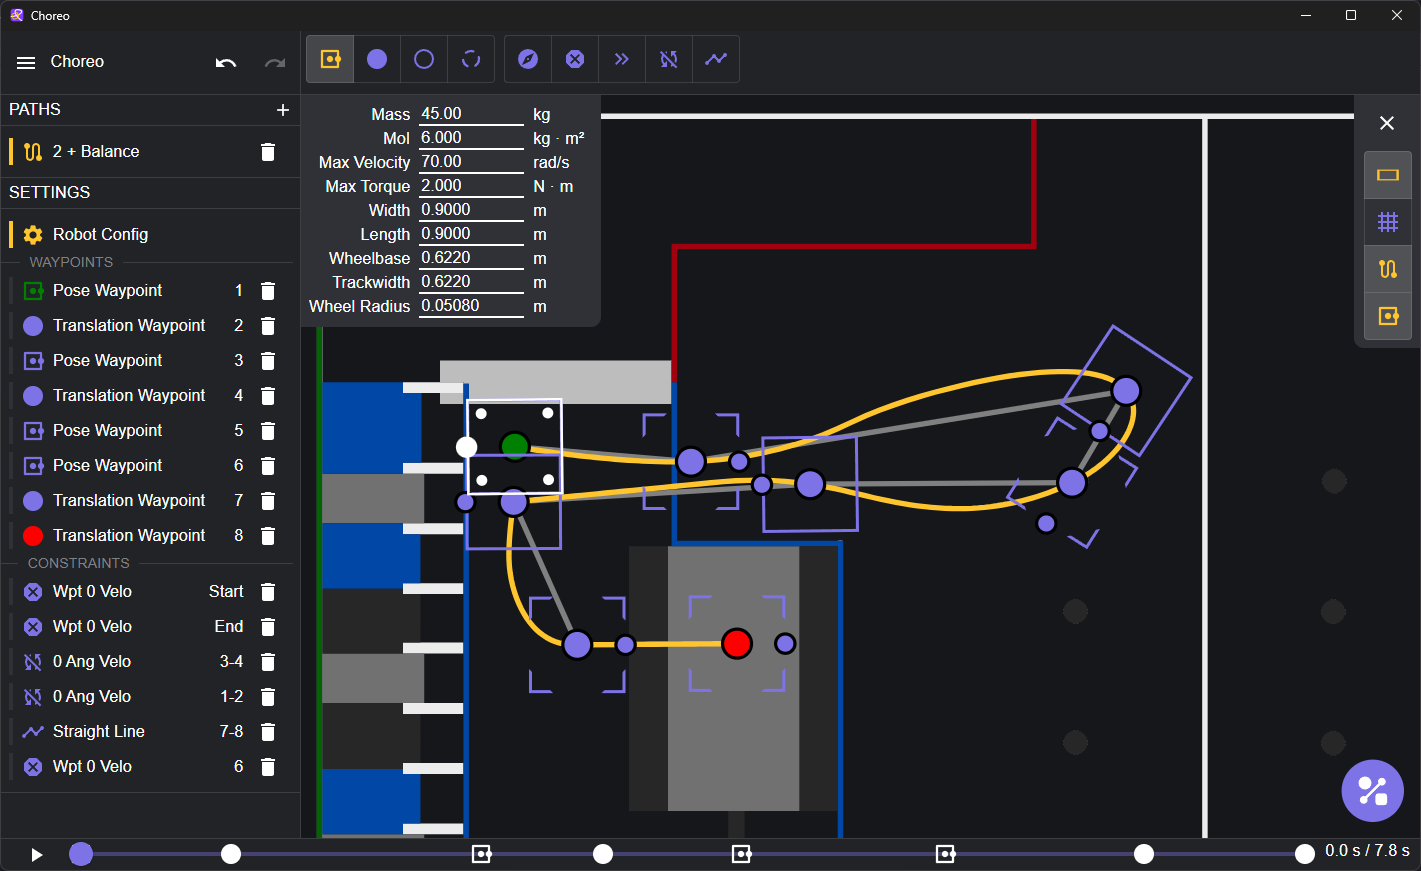
- Create Waypoints — Click on the field to add waypoints that define your path
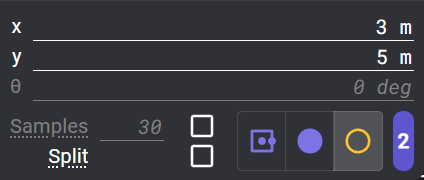
- Set Waypoint Types:
- Pose Waypoint — Specifies exact position AND heading (direction facing/angle)
-
Translation Waypoint — Specifies position only, Choreo optimizes heading
-
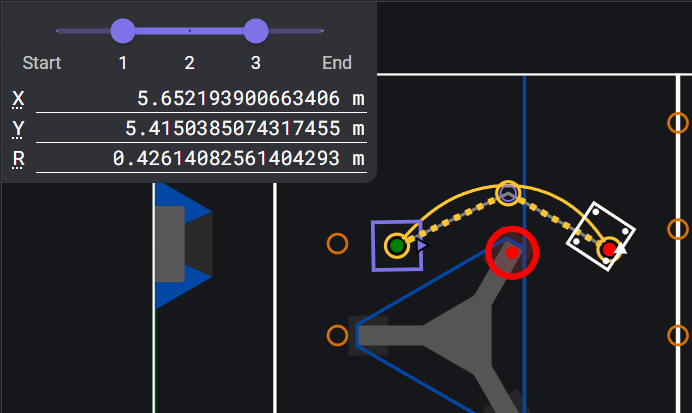
Add Constraints:
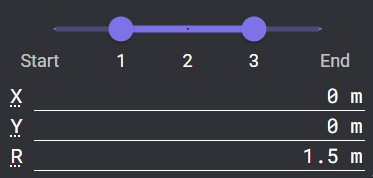
- Velocity Limit — Slow down in precision areas (e.g., near game pieces)
- Keep-Out Region — Define areas the robot must avoid
- Keep-In Region — Define areas the robot must stay within
- Point-At Constraint — Make robot face a specific point (e.g., vision target)
- Stop Point — Robot comes to complete stop at waypoint
See:

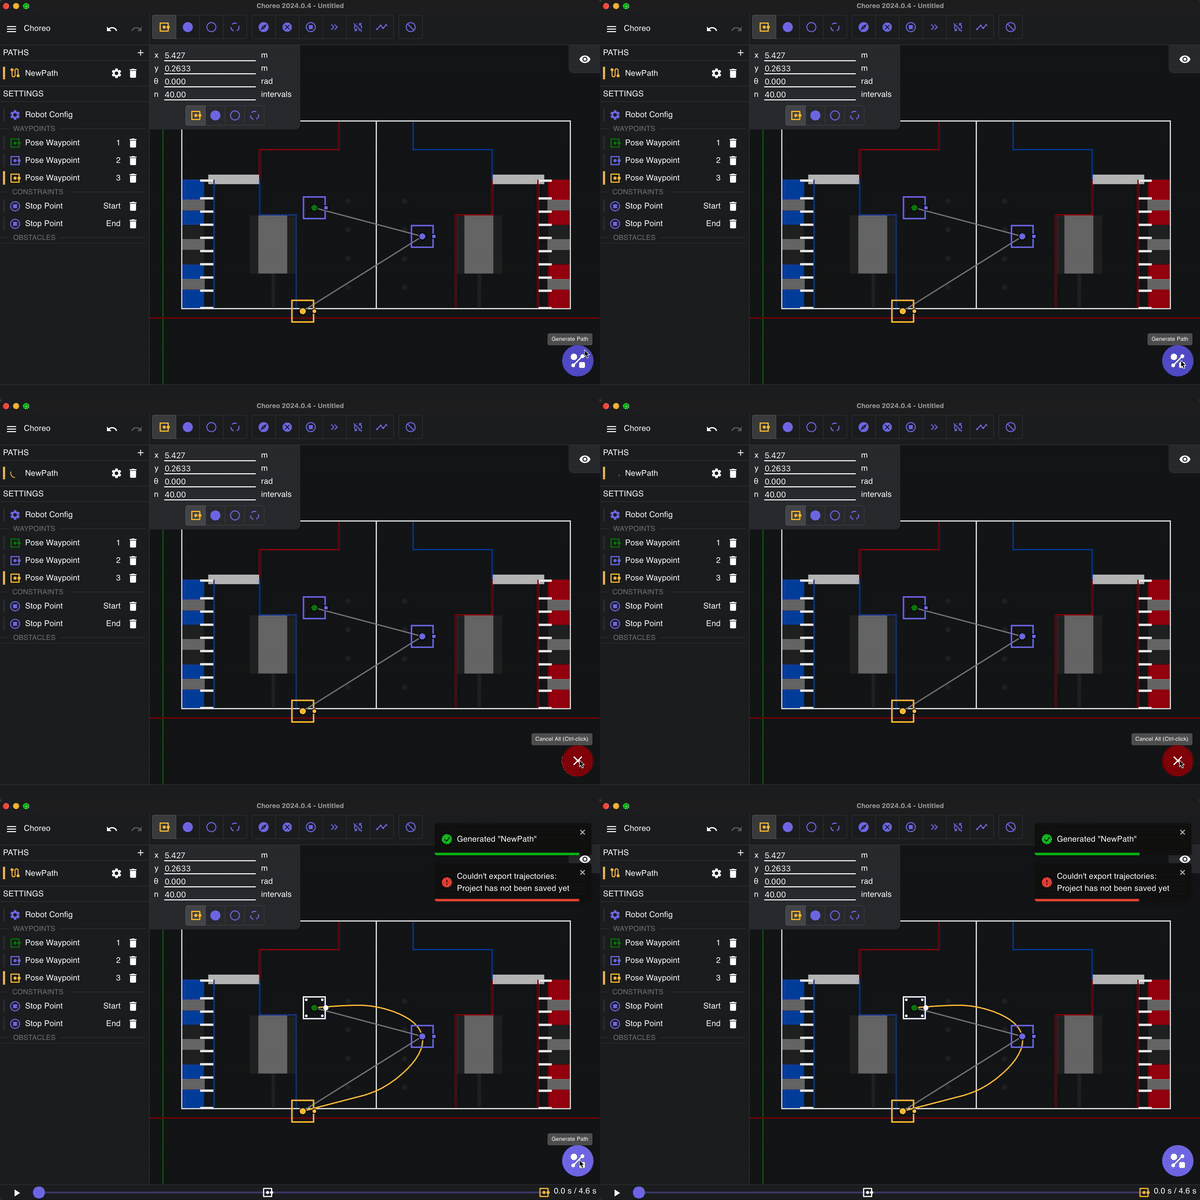
- Generate Trajectory:
- Click "Generate" button
- Choreo calculates the time-optimal path
- Watch the playback animation to verify behavior
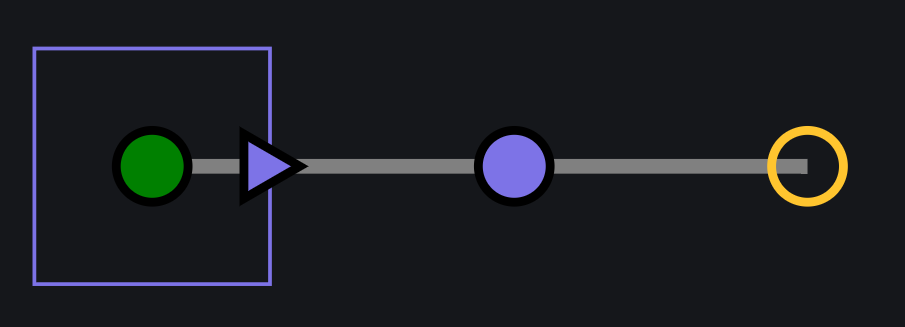
Reference Images (Choreo Docs)
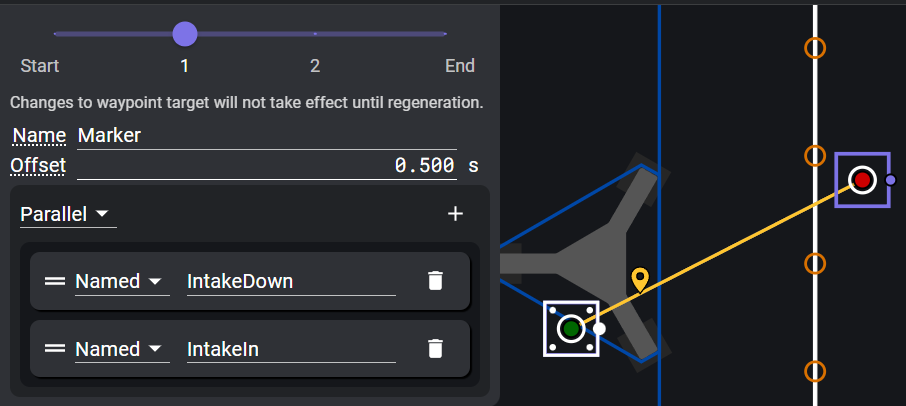
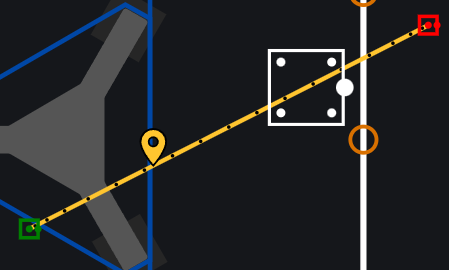
The official Choreo documentation includes helpful visuals. These are embedded from choreo.autos:
Best Practice: Using Variables for Reusability
One of the most powerful Choreo features is pose variables. These let you define named locations that can be reused across multiple paths.
Creating Pose Variables
- In Choreo, go to Document Settings > Variables
- Add a pose variable (e.g., "cs" for "Coral Station")
- Set the X, Y, and rotation values
- Give it a clear name that your team understands
Example from Your Team's Setup:
"poses": {
  "cs": { "x": "1.72 m", "y": "5.55 m", "heading": "0 deg" },
  "ab": { "x": "2.73 m", "y": "6.34 m", "heading": "60 deg" },
  "ef": { "x": "5.35 m", "y": "6.26 m", "heading": "0 deg" },
  "lk": { "x": "1.72 m", "y": "4.15 m", "heading": "0 deg" },
  "net": { "x": "0.79 m", "y": "5.55 m", "heading": "0 deg" }
}
Using Variables in Paths
When creating waypoints, reference your variables:
- Set waypoint X to
cs.x(uses the Coral Station X coordinate) - Set waypoint Y to
cs.y - Set heading to
cs.heading
You can even use expressions for offsets:
cs.x + 0.5 m— 0.5 meters in front of Coral Stationab.y - 0.2 m— Slightly lower than waypoint AB
Benefits of Using Variables
✅ Reusability — Multiple paths can share the same waypoints
✅ Consistency — All paths use exact same field positions
✅ Easy Updates — Change one variable, update all paths that use it
✅ Semantic Naming — "cs" is more meaningful than "1.72, 5.55"
✅ Team Communication — Everyone understands "go to cs then to ab"
Your Team's Naming Convention:
cs= Coral Station (scoring location)ab,cd,ef,gh= Field waypoints (alphabetical)ji,lk= Additional waypointsnet= Starting position near netproc= Processor side location
This makes paths like ji_cs immediately understandable: "go from JI waypoint to Coral Station."
Implementing Auto Routines with Choreo
Trajectory Naming Convention
Use descriptive names that show the path's start and end points:
top_ji— From top starting position to JI waypointji_cs— From JI waypoint to Coral Stationcs_lk— From Coral Station to LK waypointlk_cs— Return from LK waypoint to Coral Station
This makes it easy to chain paths together in auto routines.
Combining Paths with Robot Actions
Use Commands.sequence() to combine path following with other commands:
public void configAutonomous() {
  // Score preloaded game piece, drive to station, intake another
  Command scoreAndIntake = Commands.sequence(
      // 1. Drive to scoring position
      runPath("net_reef"),

      // 2. Score the game piece
      new ScoreCommand(elevator, wrist).withTimeout(1.5),

      // 3. Drive to intake station
      runPath("reef_station"),

      // 4. Intake while approaching
      new IntakeCommand(intake).withTimeout(2.0)
  );

  autoChooser.setDefaultOption("Score and Intake", scoreAndIntake);
}
Your Team's Pattern: Reusable Auto Segments
Your code has an excellent pattern for reusable auto segments:
// Helper method that scores then collects
Command ScoreAndCollect(String startPath, String endPath,
                       Command reefAutoDrive,
                       Command prepCommand) {
  return Commands.sequence(
      Commands.runOnce(() -> setRobotState(HAS_CORAL)),
      runPath(startPath),              // Drive to scoring position
      reefAutoDrive.alongWith(         // Approach reef while preparing
          Commands.waitSeconds(0.3).andThen(prepCommand)
      ).withTimeout(2),
      new ScoreCoralCommand().withTimeout(0.6),  // Score
      runPath(endPath),                // Drive to collection point
      new IntakeCoralCommand().withTimeout(10)   // Collect next game piece
  );
}

// Use it to build complex autos
Command fourCoralAuto = Commands.sequence(
    ScoreAndCollect("top_ji", "ji_cs", REEF_DRIVE_RIGHT, PREP_LEVEL_4),
    ScoreAndCollect("cs_lk", "lk_cs", REEF_DRIVE_RIGHT, PREP_LEVEL_4),
    ScoreAndCollect("cs_lk", "lk_cs", REEF_DRIVE_LEFT, PREP_LEVEL_4),
    ScoreAndCollect("cs_ab", "ab_cs", REEF_DRIVE_LEFT, PREP_LEVEL_4)
);
Why This Pattern Works:
- Reusable logic reduces code duplication
- Easy to test individual segments
- Can mix and match paths for different autos
- Clear sequence of actions
Running Commands Alongside Paths
Use .alongWith() or .deadlineWith() to run commands in parallel:
// Intake WHILE driving
Command driveAndIntake = runPath("station_reef")
    .alongWith(new IntakeCommand(intake));

// Drive UNTIL intake finishes (path may end early)
Command driveUntilIntake = runPath("station_reef")
    .deadlineWith(new IntakeCommand(intake));

// Prep mechanisms while approaching
Command approachAndPrep = runPath("field_scoring")
    .alongWith(
        new ElevatorToPositionCommand(elevator, SCORING_HEIGHT),
        new WristToAngleCommand(wrist, SCORING_ANGLE)
    );
This maximizes cycle time by doing multiple things simultaneously.
Resetting Odometry to Starting Pose
Important
ALWAYS DRAW BLUE AUTOS IN CHOREO!!!
* GOOOOOOOD SECTION HERE *
Reset your robot's odometry when an auto is selected. Create a mapping of Command objects to their starting poses:
// In RobotContainer, create a map of Command objects to starting poses


// In configAutonomous(), build your autos and add the onChange listener
public void configAutonomous() {
  // Build your auto commands
  fourCoralNonProcAuto = Commands.sequence(
      ScoreAndCollect("top_ji", "ji_cs", REEF_DRIVE_RIGHT, PREP_LEVEL_4),
      // ... more commands
  );

  // Add to chooser
  autoChooser.setDefaultOption("4 Coral - Non-Processor Side", fourCoralNonProcAuto);
  autoChooser.addOption("4 Coral - Processor Side", fourCoralProcAuto);
  autoChooser.addOption("1 Coral - Mid", oneCoralMidAuto);
  autoChooser.addOption("3 Algae - Mid", threeAlgaeMidAuto);

  SmartDashboard.putData("AutoChooser", autoChooser);

  Map<Command, String> autoStartingPoses = Map.ofEntries(
    Map.entry(auto1CommandName, "firstRunPathAuto1"),
    Map.entry(auto2CommandName, "firstRunPathAuto2"),
  );

  // Listen for auto selection and reset odometry
  autoChooser.onChange(selectedAuto -> {
    String startingPose = autoStartingPoses.get(selectedAuto);

    if (startingPose != null) {
      autoFactory.resetOdometry(startingPose)
          .ignoringDisable(true)  // Run even when disabled
          .schedule();
    }
  });
}
How It Works:
- Map each
Commandobject (your auto routine) to its starting pose name - When an auto is selected via the chooser,
onChangeis triggered - Look up the selected command in the map to find its starting pose
- Reset odometry before the match starts
Your Team's Pattern:
Since your autos are defined as Command fields in RobotContainer, this mapping is type-safe and matches your actual code structure.
Testing and Safety
Start in Simulation
Before running on a real robot:
- Test paths in WPILib simulation
- Use Glass or AdvantageScope to visualize the path
- Verify odometry tracks the path correctly
- Check for any unexpected behavior
Conservative First, Then Optimize
When first testing a new path:
- Add velocity constraints to slow down the entire path
- Test on blocks or with the robot secured
- Gradually increase speed as confidence grows
- Add more aggressive constraints only after basic path works
Example constraint progression:
- First test: 1 m/s max velocity
- After successful test: 2 m/s max velocity
- Competition ready: 4+ m/s with optimized constraints
Verify Alliance Flipping
Critical: Test your autos on BOTH alliances!
// In configAutonomous(), verify alliance flipping works
Command testFlipping = Commands.sequence(
    Commands.runOnce(() -> {
      System.out.println("Alliance: " + DriverStation.getAlliance());
      System.out.println("Starting pose: " + drivetrain.getPose());
    }),
    runPath("top_ji")
);
If alliance flipping is enabled in AutoFactory, the path should mirror for red alliance automatically.
Incremental Complexity
Your team's approach is excellent: You have 4+ autonomous routines that work reliably because you built them incrementally:
- Start Simple:
net_off_startingline— Just drive off the line - Add Scoring:
1_coral_mid— Score one game piece - Add Collection: Paths between scoring and intake stations
- Complex Sequences:
4_coral_nonProcSide— Multiple score cycles
Each level builds on the previous one. Don't try to build a 5-piece auto on day one!
Safety Checklist
Before enabling autonomous:
- [ ] Physical barriers around robot (for first tests)
- [ ] Driver station ready to disable immediately
- [ ] Team members clear of robot path
- [ ] Verify correct auto is selected
- [ ] Announce "ENABLING AUTONOMOUS" to team
- [ ] Watch for unexpected behavior (jerking, wrong direction)
Advanced Topics
Event Markers (Optional)
Choreo supports event markers that trigger commands at specific times. If desired, you can bind event names in AutoFactory and add matching markers in the Choreo GUI so commands fire at precise moments during a path.
Choreo Resources
- Official Website: https://choreo.autos
- ChoreoLib Documentation: https://choreo.autos/choreolib/
- Getting Started Guide: https://choreo.autos/choreolib/getting-started/
- Path Editing Guide: https://choreo.autos/usage/editing-paths/
Tips for Reliable Auto Code
- Reset sensors (encoders, gyro) at the start of auto.
- Use feedback (PID, MotionMagic, etc.) for precise movement.
- Keep it simple—a reliable simple auto is better than a broken complex one.
- Test on the real field—carpet and obstacles affect performance.
- Add failsafes (timeouts, checks) to prevent getting stuck.
More Resources
This guide is for beginners. Start simple, build up, and experiment!